Virtual Private Networks (VPNs) are essential tools for enhancing your online privacy and security. V2Ray is a popular choice, known for its versatility and strong encryption. In this tutorial, we'll guide you through the process of connecting to a Secologist V2Ray VPN on your macOS device.
Prerequisites for V2Ray VPN on macOS
Before we begin, ensure you have the following:
V2Ray Server Details: You need the server address, port, user ID, and additional configuration details provided by your V2Ray service provider. You can buy an Anonymous V2Ray Subscription or set up your server following our post on Medium.
A macOS Device: This tutorial is applicable for Mac, iMac, MacBook, Mac Mini, and Mac Studio.
Please set your system timezone settings automatically and correctly to avoid SSL-related errors.
Subscription Profiles for V2Ray VPN
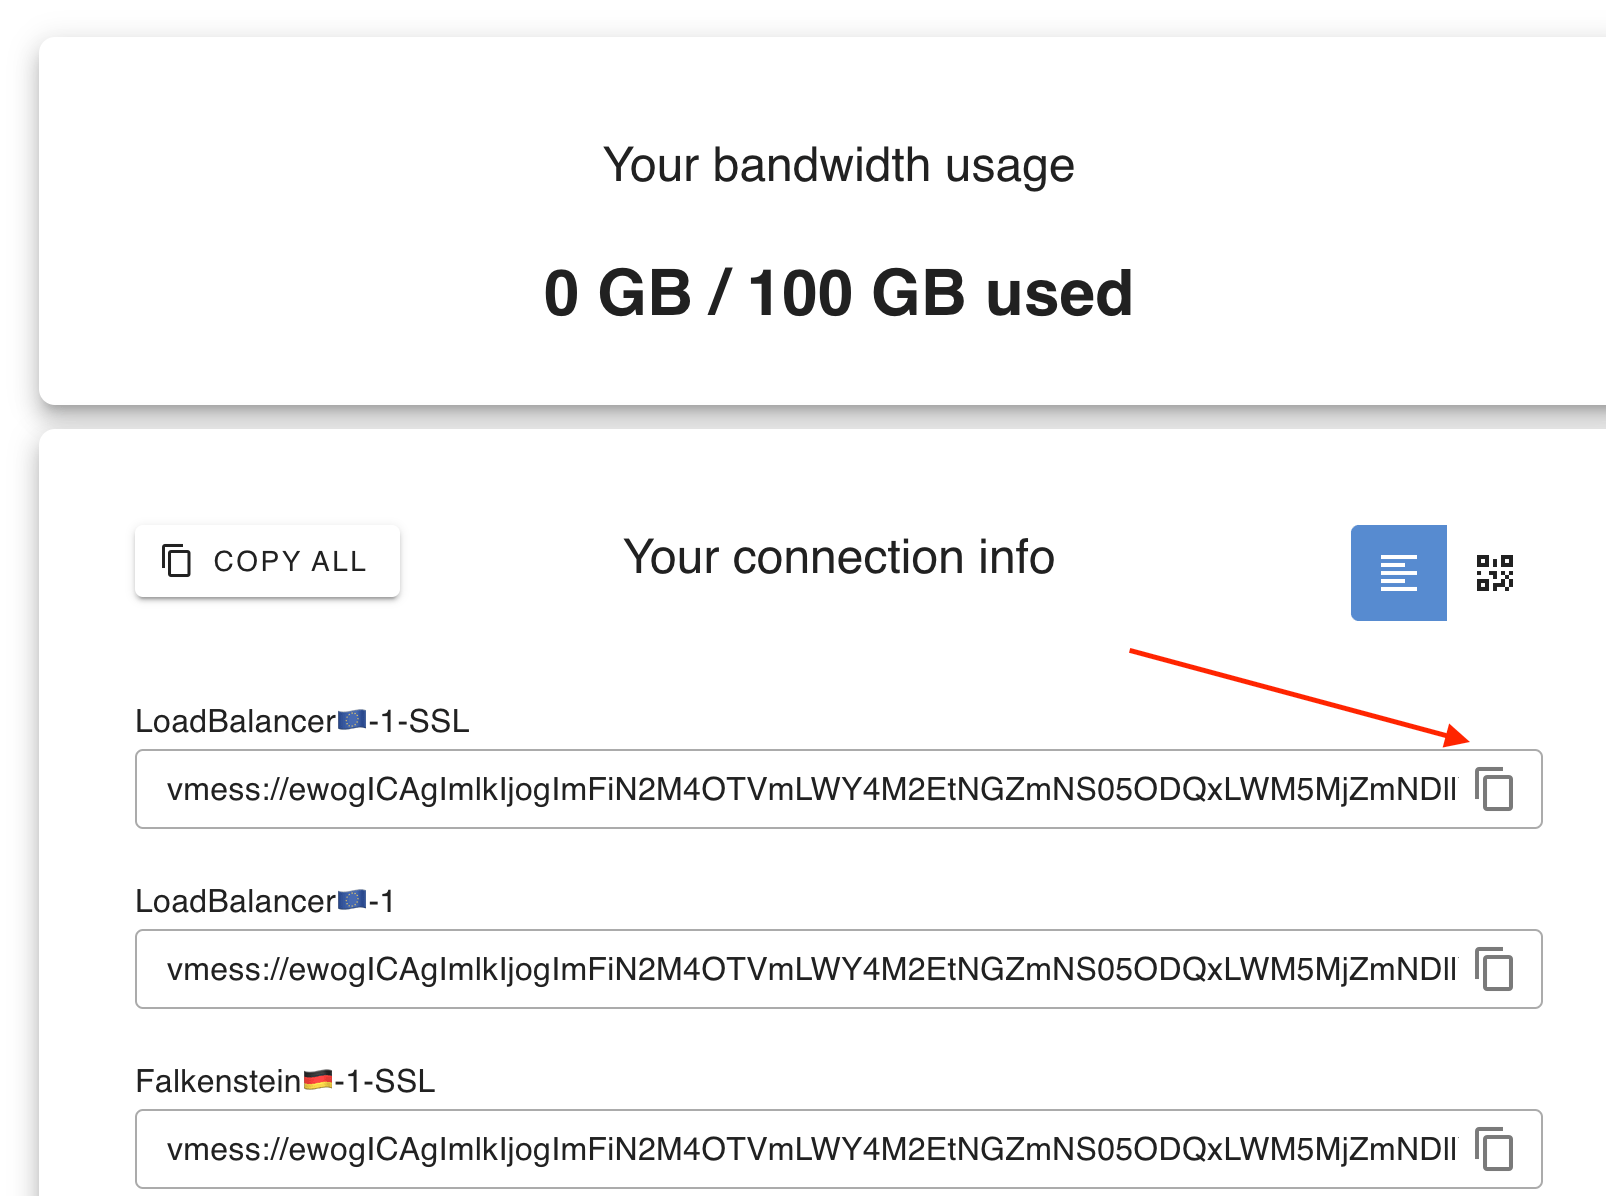
Once you purchase our subscription, you will receive a link with the list of your available profiles/servers, including the V2Ray subscription URL, which will be used to auto-import all provided servers.

Install and Configuring macOS V2Ray VPN Client Application
V2Box - V2Ray VPN Client
You can follow the simple steps below to utilize V2Box, import your V2Ray VPN Profiles, and enjoy surfing the internet with speed, security, and privacy.
Download and install V2Box from the App Store.
Copy one of the connection profiles, e.g., "LoadBalancer🇪🇺-1-SSL" by clicking on the copy icon on the right side of the connection profile.
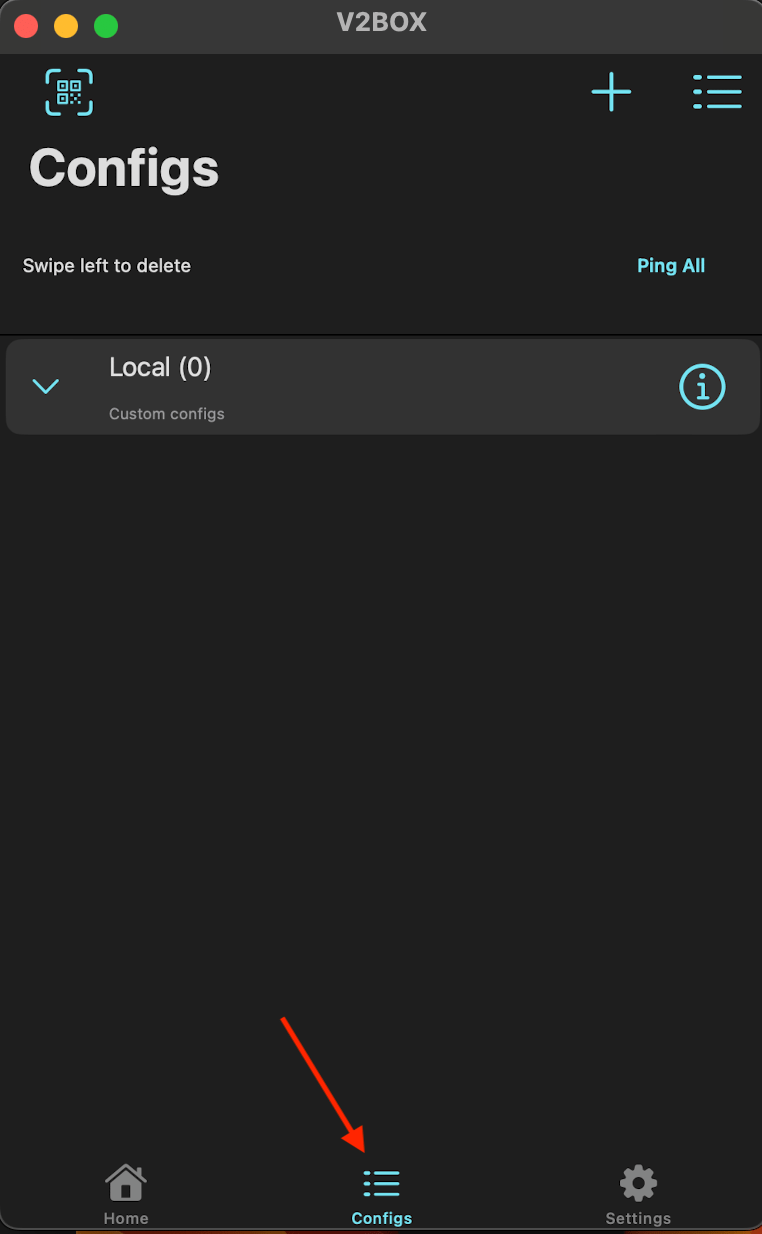
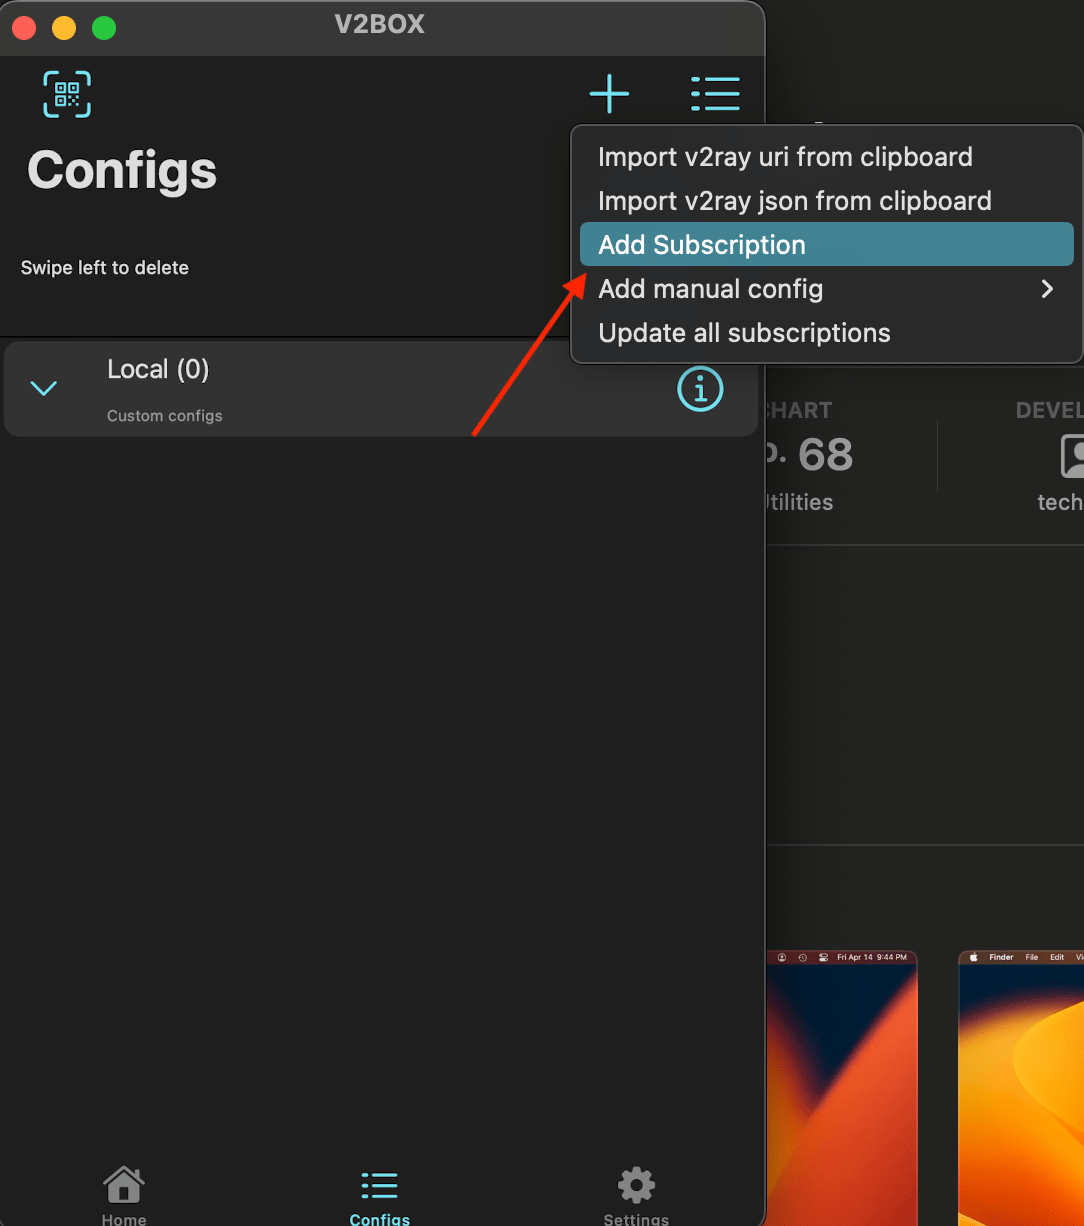
Open the application and navigate to the "Configs" tab.
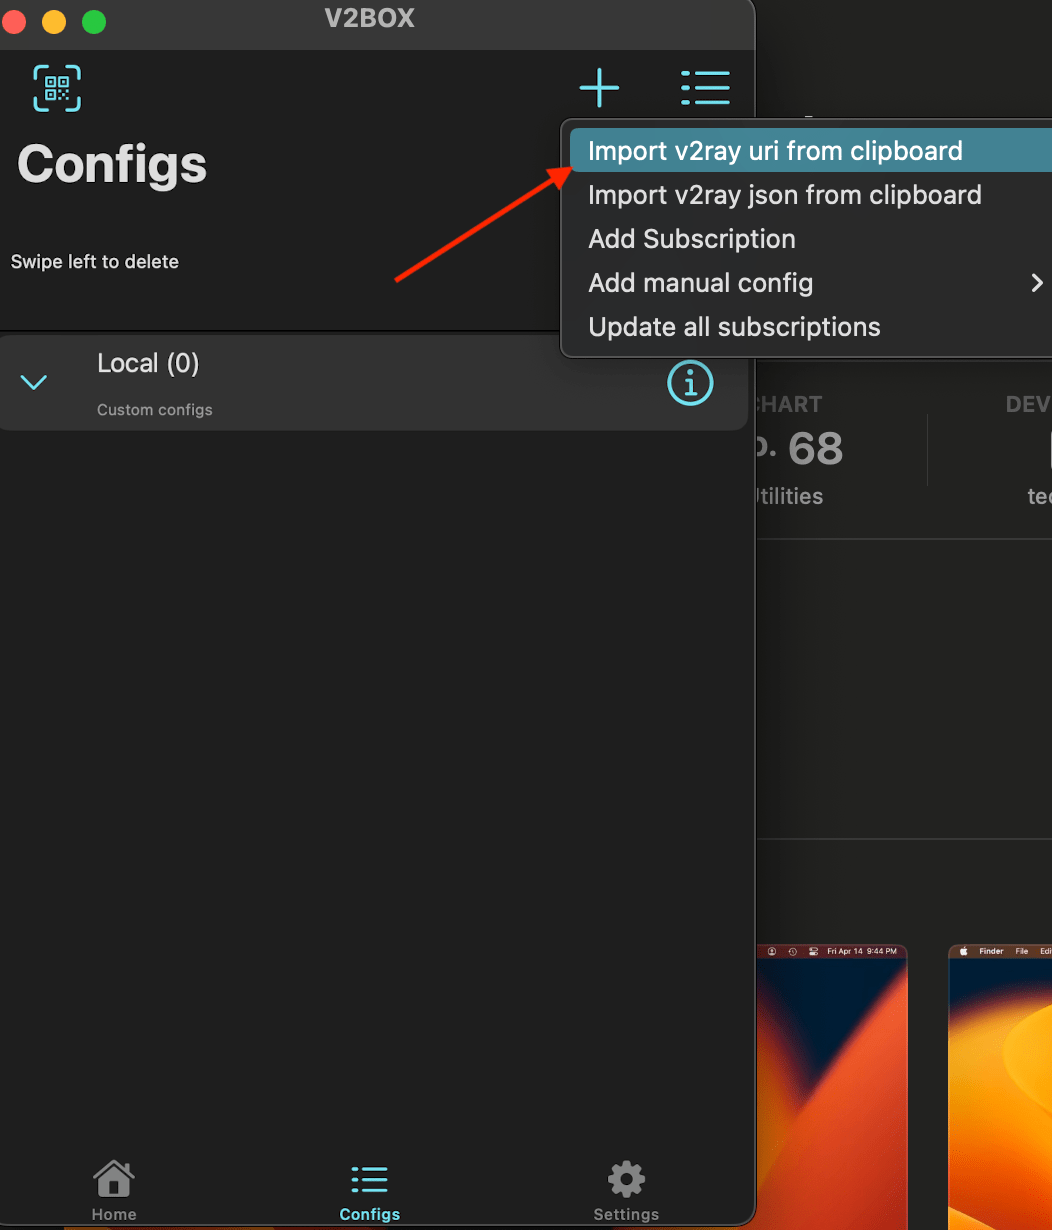
Click on the "+" icon and then click on "Import v2ray uri from clipboard".
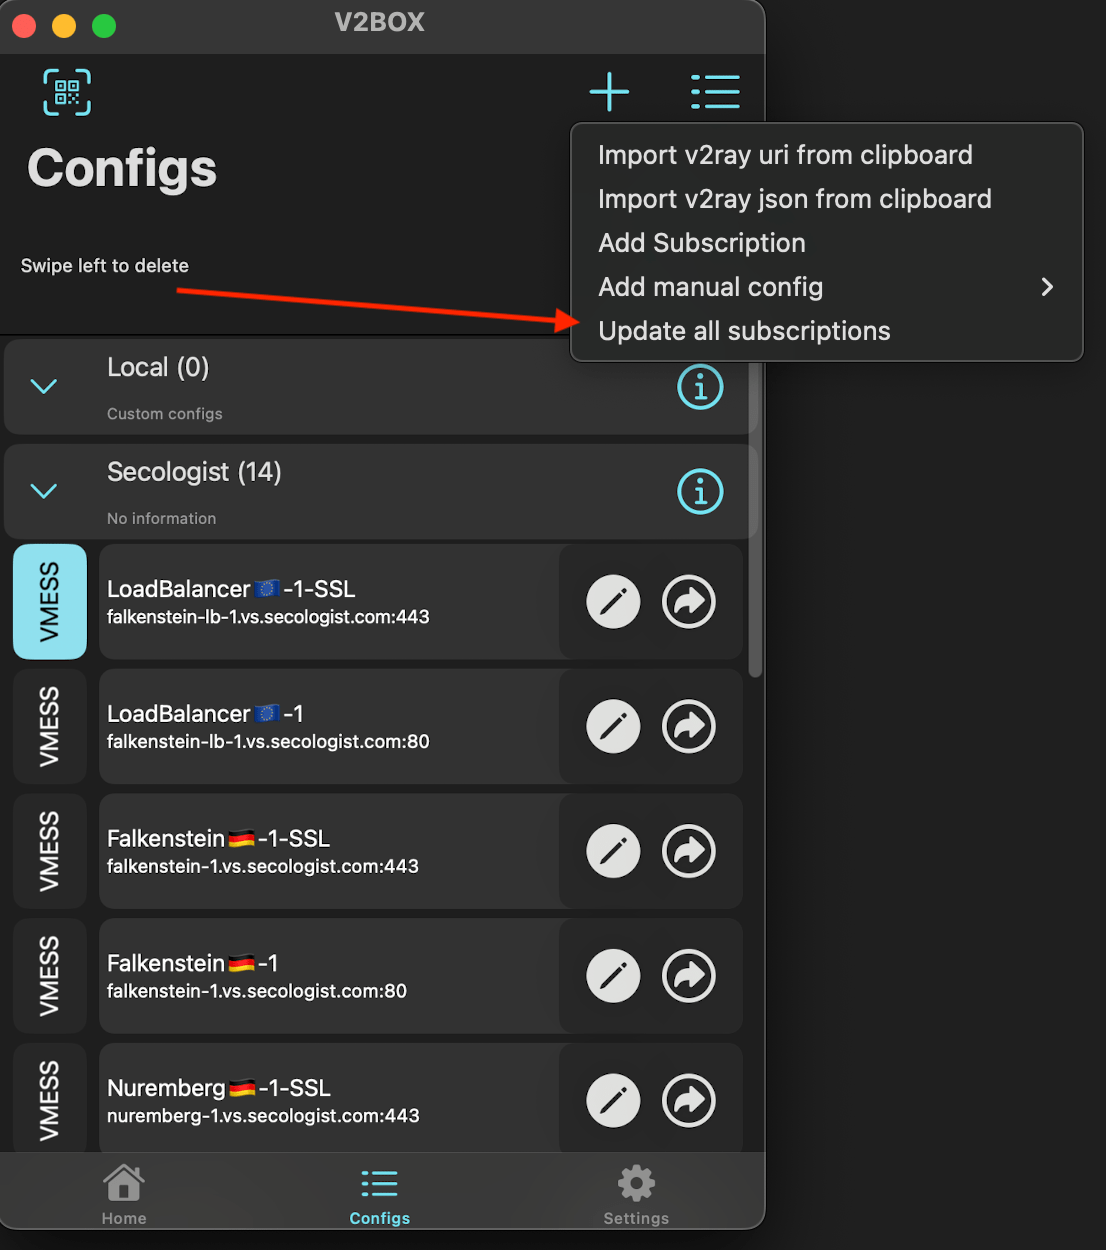
You can keep repeating that or use a subscription URL to import all of the subscriptions (sent by email).
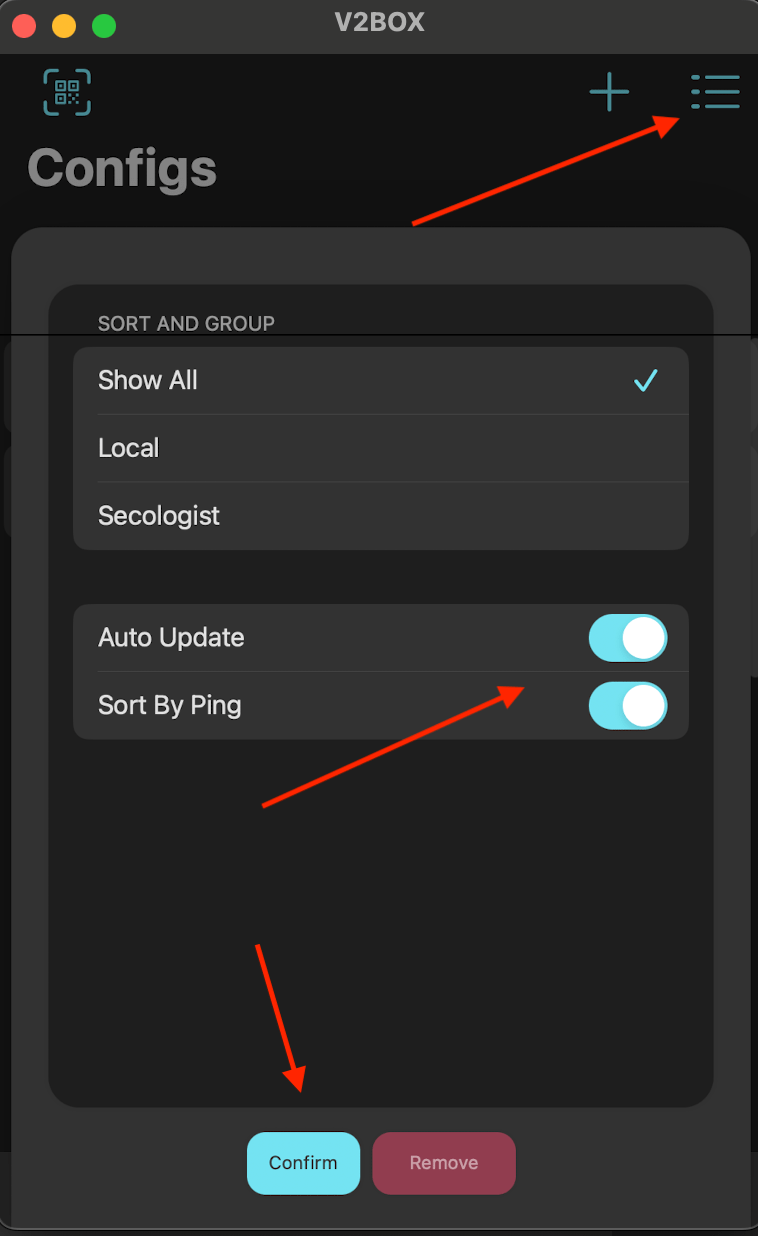
Make sure you have subscription auto-update turned on by clicking on the settings in the top right corner.
Click on the "+" and then "update all subscriptions" to update the profiles manually.
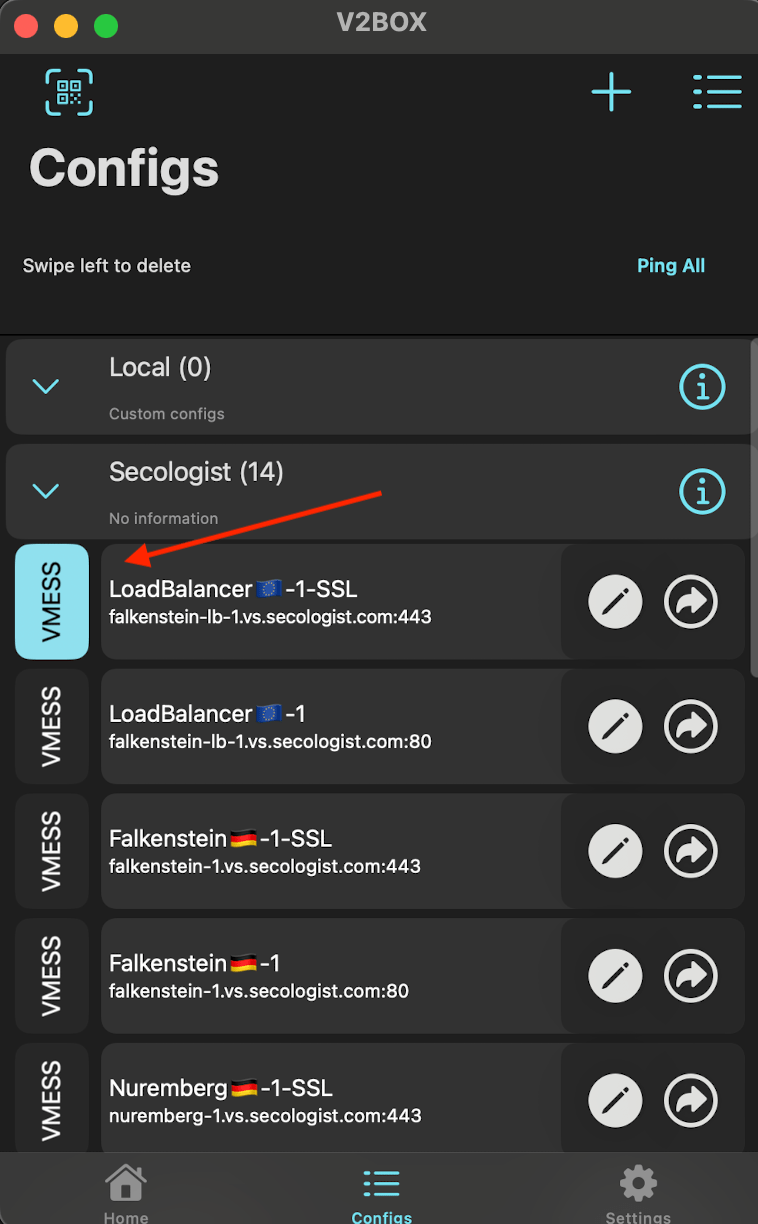
Once you have the profiles imported, you need to select one by clicking on them, and when the left corner turns blue, it means the profile is selected.
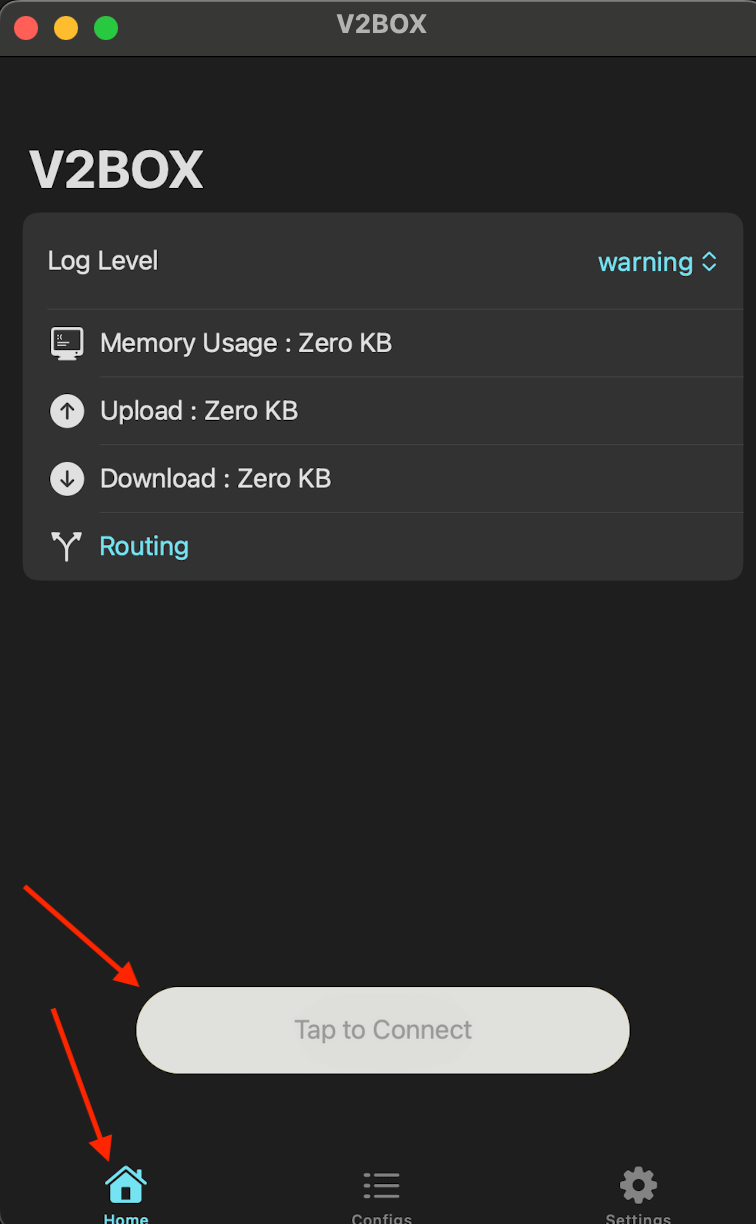
Now go to the "Home" tab and click on the "Tap to Connect" button.
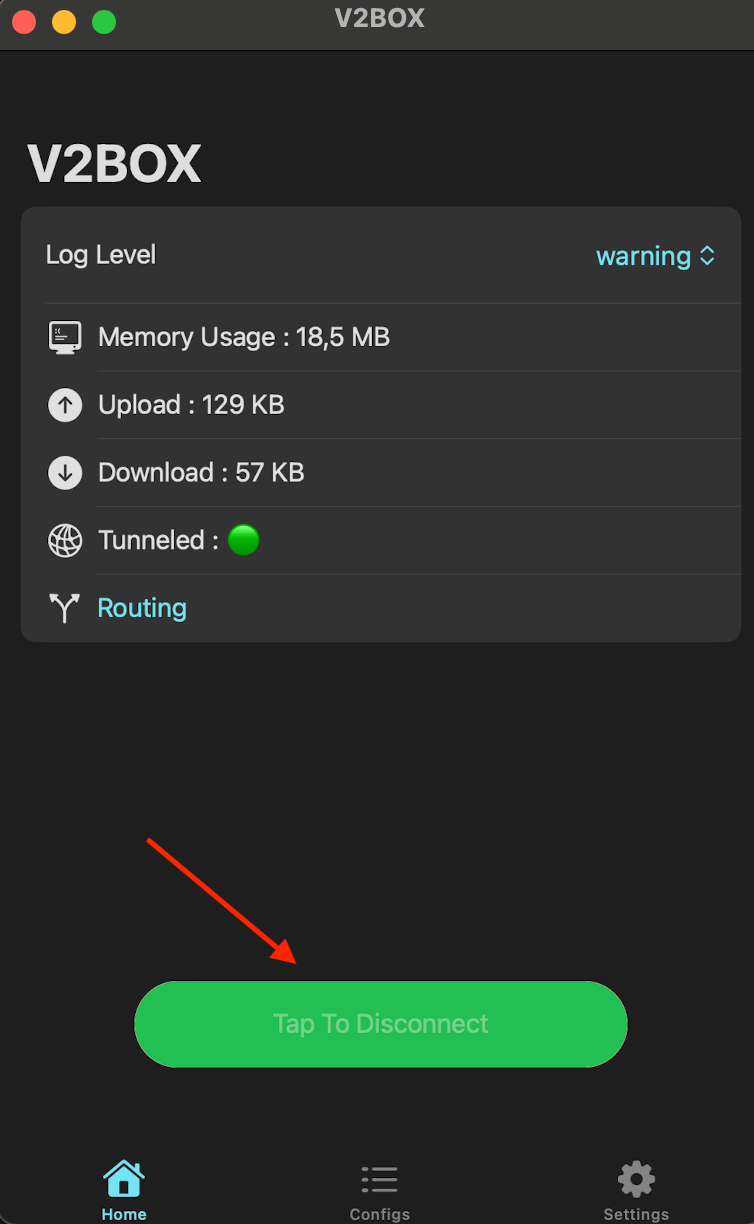
You can see the VPN is connected, and the status is updated.
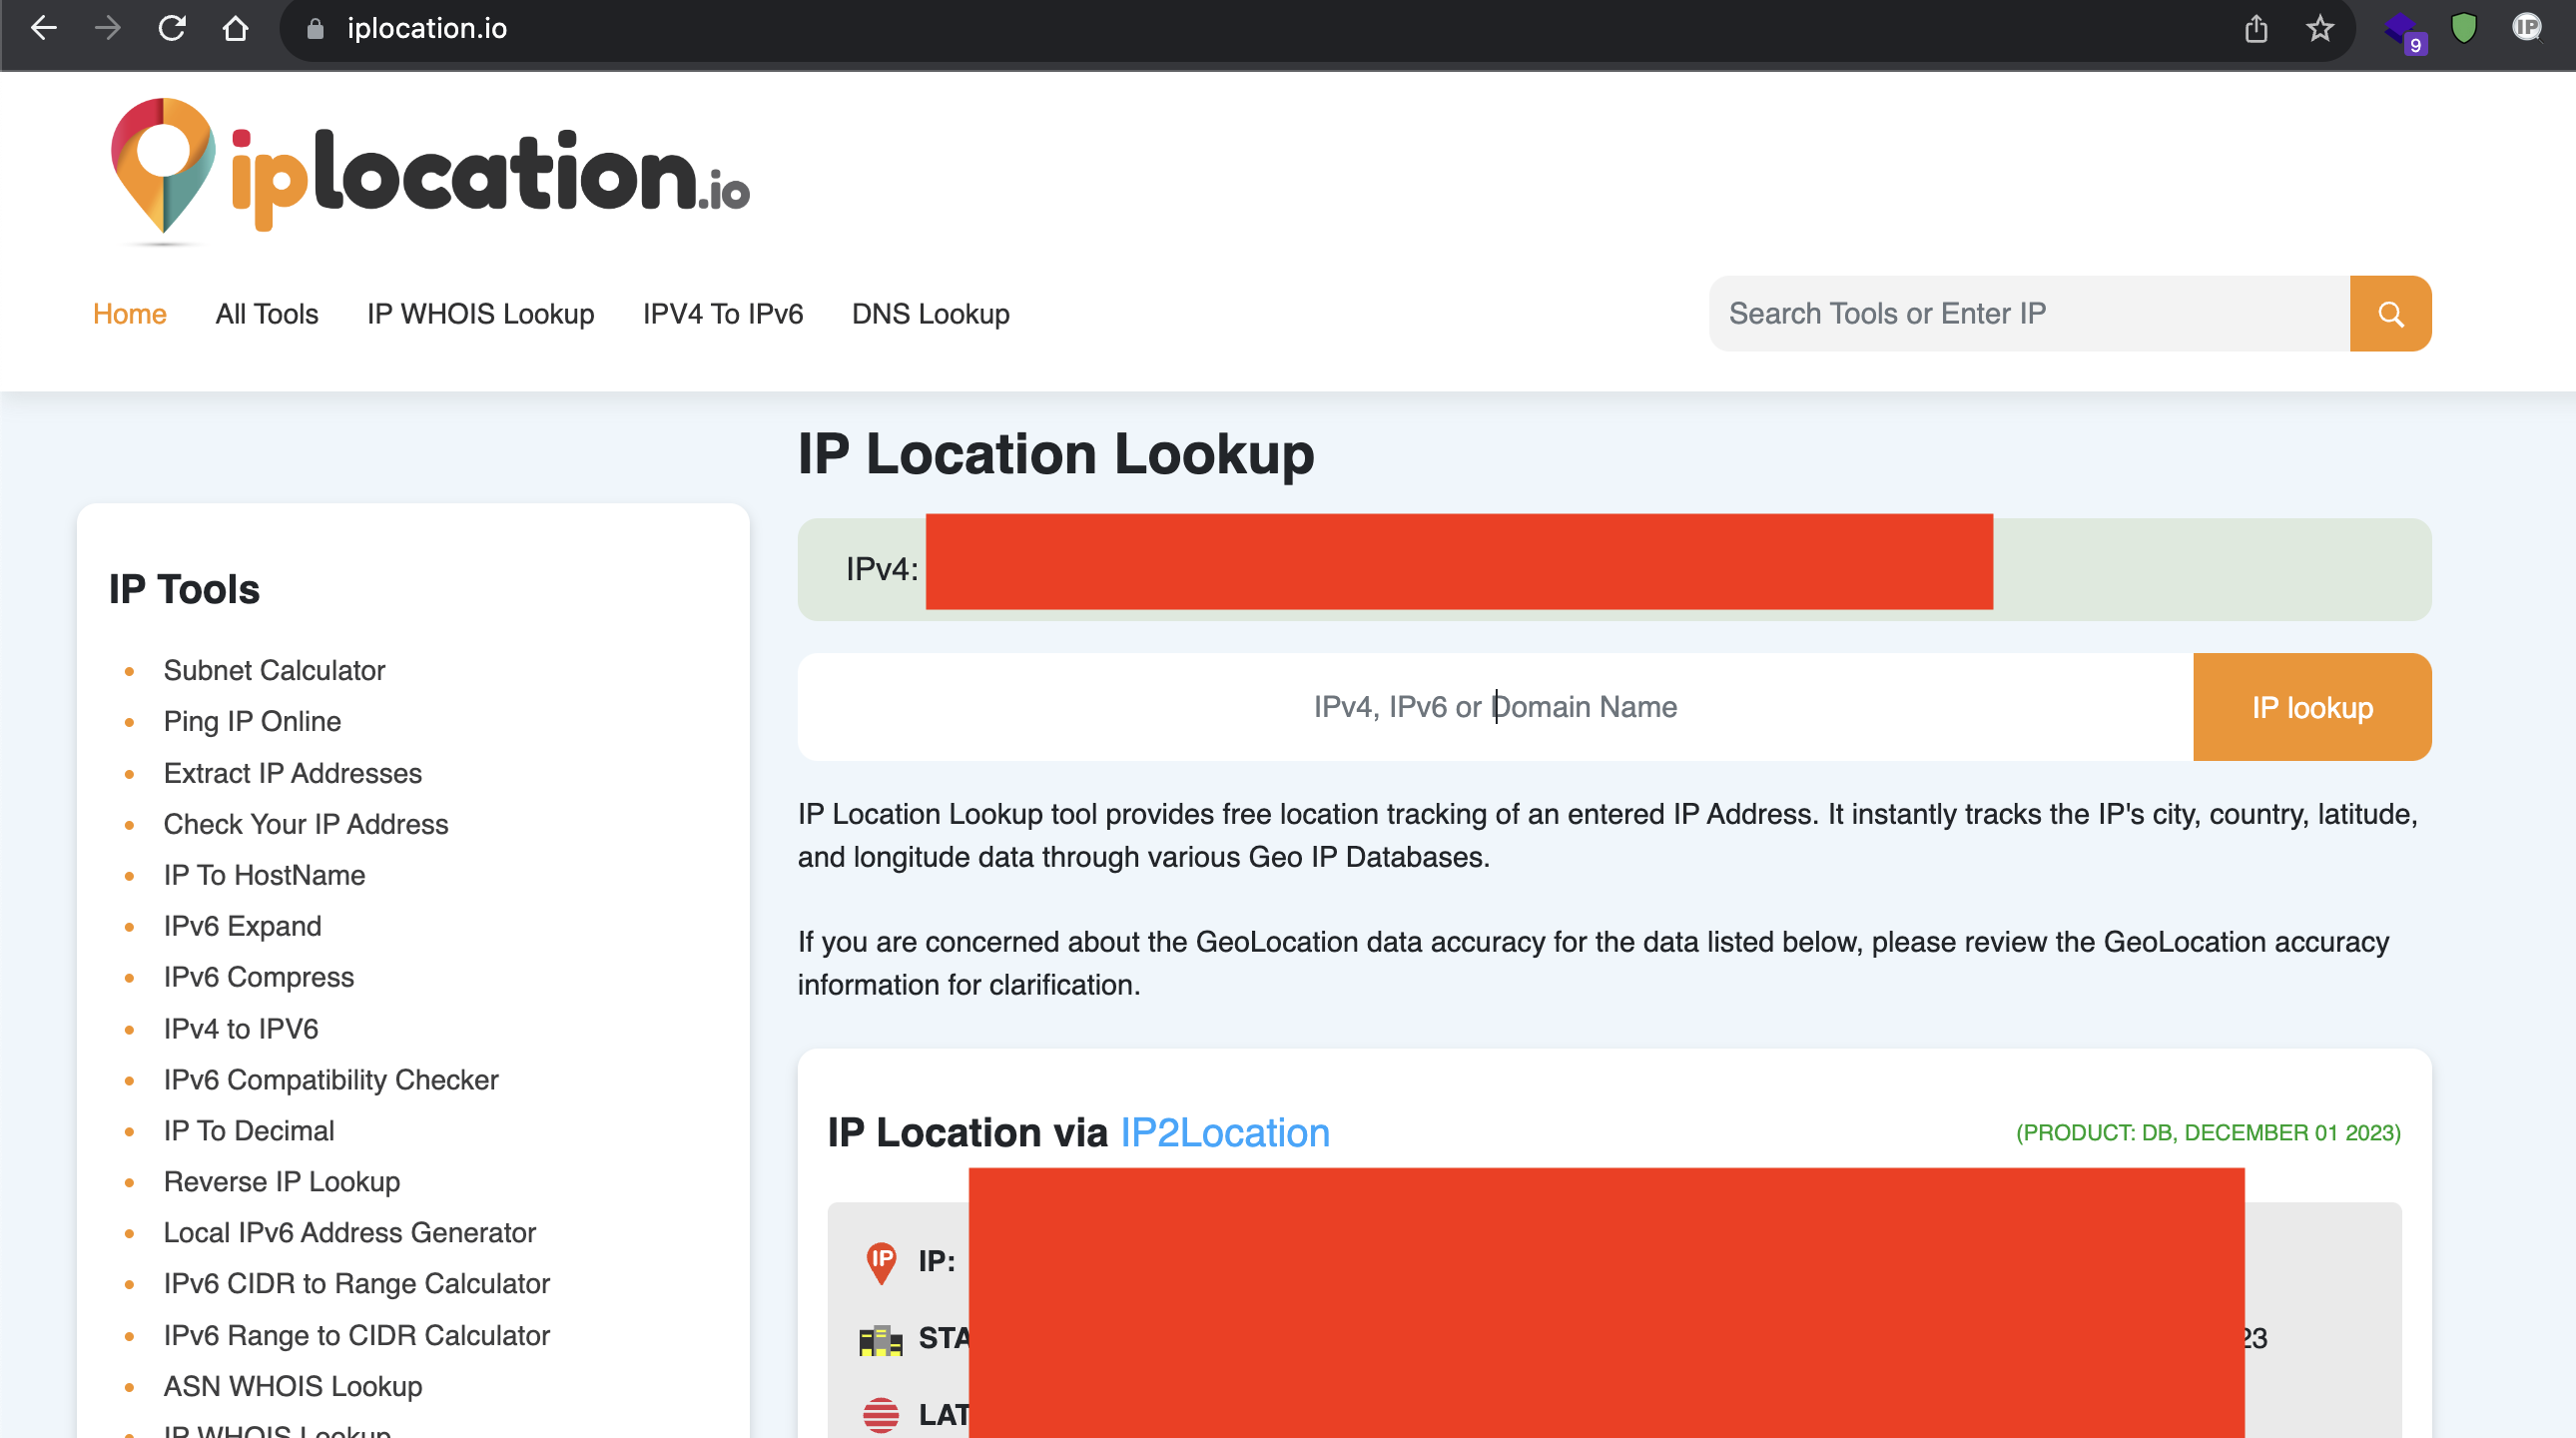
To confirm your connection, you can visit iplocation.io and check your IP.